Saturday, January 4, 2014


3. NATIVE AMERICAN—DREAM CATCHERS

Many children suffer with sleep problems and bad dreams.  Native Americans had the perfect solution for this problem that plagues children. It is the Dream Catcher, a round wire hanging with cords woven in a spiderlike pattern inside the circle, and leather cords hanging with beads and feathers dangling.  The tale of the dream catcher, depending which tribe wove it (most Indian tribes have a dream catcher) is that the weaving catches the bad dream and prevents it from getting to the child. The other tale is that the dream catcher web throws the bad dream out so the child only has good dreams.

Most children are familiar with dream catchers and love to make them.  Parents also love the dream catchers and always vocalize their pleasure when we make them in class.  Our dream catchers are made from sturdy cardboard. The dream catcher needs more help from the adult then most of my crafts.

1.      Make a circle from sturdy cardboard. Oak craft paper and files used to be good, but now are too thin to use unless you double them. I use either a desert plate or larger paper plate to make my circle.

2.      Cut another circle within the larger circle leaving enough room to punch holes in the remaining circle. You need space to use a paper punch’

3.      Put 14 holes evenly around the circle with a paper punch.


4.      Put 4 extra holes on the bottom for the fringe and one extra hole on top to make   the hanger.

5.      Number the holes each number opposite the next—ie-1 on top, 2, at bottom, 3 next to the right of one, 4 to the left of 2

6.      Have the children decorate the cardboard.


7.      Give each child enough string or sometimes I use colored knitting yarn, to weave, following the number pattern-ie-first in 1 then to 2 back to 3, etc.

8.      You will have to tie the end for the child. Then tie cords in the holes to hang from the bottom.

9.      Have the children put beads and feathers on the bottom of the hanging
 

10.  Put a loop on top to hang from.

As difficult this is for you to help the kids make, it is well worth the effort as both parents and children get so much pleasure from them. Years later the parents and the kids always remember their dream catcher craft, and many will still have them hanging in their room over their bed.

Wednesday, January 1, 2014


2.-- NATIVE AMERICAN—DRUMS, COMMUNICATION AND SYLLABLES

Now that the kids have become interested in Native American Indian life before the modern conveniences I asked how the Indians communicated long distances without telephones, cell phones, computers or any electrical or battery devices.  It again was very hard for them to conceive of any time when there were no modern devices and they were clueless.
I told them that the braves had to travel long distances to find food such as deer, buffalo, or other game. Each brave went in different directions to scout out the food.  How did they get together to hunt the game when it was spotted? They couldn’t call on the cell phone, how did they do it? No one could figure it out.  Did you ever hear of smoke signals, I asked?  Most had not as cowboy and Indian movies are not on their screens anymore.  I explained the usage of smoke signals and then went on to drums.
Drums can be heard for long distances.  We experimented with distances of people calling with their own voice.  I appointed a child to go into a different room and call out. Could the others hear? We tried many different places to see how far the voice could be heard.  Then I gave the drum to the children to use.  Could it be heard a greater distance? As you can guess the drum could be heard at a much greater distance.

The next question was how was it used? How did the other scouts know what was being said by the drummers.  I drummed “I found deer” by hitting the drum 3 times.  Each word I used was one syllable.  Then I drummed “ I found buffalo”  I found was one syllable each but buffalo was three.  I drummed two beats and 3 quick beats for buffalo.  I explained what syllable meant and how buffalo was three quick ones.  We practiced with many other words until the kids got the idea.
They wanted to make their own drums so they could practice “talking” with the drums.  To make a drum I used coffee cans.  The plastic top of the can is the drumming part.  The metal sides we covered with colored paper. On the art table I put feathers, markers, and beads for the kids to choose what they want. The kids work area had the glue. I do not tell the kids how to design the projects I give. I want them to use their own imagination and to take charge of their own project.  I find children to be more creative than I am and they have more fun than if I directed what they should put on the drum. Leave one day for the glue to dry before allowing  the to kids use their drums.
I showed the kids pictures of the mountains in the southwest and the reservations I had visited. We pretended we were on a hunt for food and the brave who found the food had to drum he found food.  The others drummed back “we are coming (coming two quick drumbeats for two syllables). Then I let the kids make up their own plays.  Some were being attacked by other Indians and using the drum to call for help. One play was getting lost on the mountain and calling to the others for help in getting home.  The kids loved making up scenarios.


On U-tube you can find all kinds of Native American music and festivals. The kids love using their drums to beat along to the music.

Sunday, December 29, 2013


1-NATIVE AMERICAN PAST AND PRESENT --BOW AND ARROW CRAFT


In the fall most kindergartens and other school classes teach about the Pilgrims and how the Native Americans helped them to survive in our country.  I go a step further and teach about the Native Americans all over our USA and how they live now and in the past.  Most children have the concept that “Indians” lived in America way, way back and think the Natives no longer are alive.  They are shocked to find that Native Americans are alive and well and still live in the USA, in fact some are even in our classroom.  Each year as I teach a unit on Native Americans ‘ some of the children find out that they are part Native American.  In one class I had there were 5 with Native Americans ancestors. It also is important to make sure the kids know that Native American children have to go to school just like them, that they live in houses, have cars, TV’s, computers and everything they have because they live in the USA just like them.

Since most children think of “Indians” shooting bows and arrows, I peak their interest by explaining about why they had bows and arrows and how they were made. I take them back to the past when there were no stores, TV, internet, electricity, cars, etc.  This is almost inconceivable to the kids.  Couldn’t they just buy them? Why weren’t there stores? Are some of the questions I get from the kids’?  I explain how everything had to be made by hand and from whatever materials were in nature and there was no metal to make guns, knives, or any other equipment needed by the Natives.  In order to get food they had to make their own bows and arrows to shoot their food.  I explained how clothes, housing, tools, food containers, etc. had to be made from nature.

Bow and Arrows

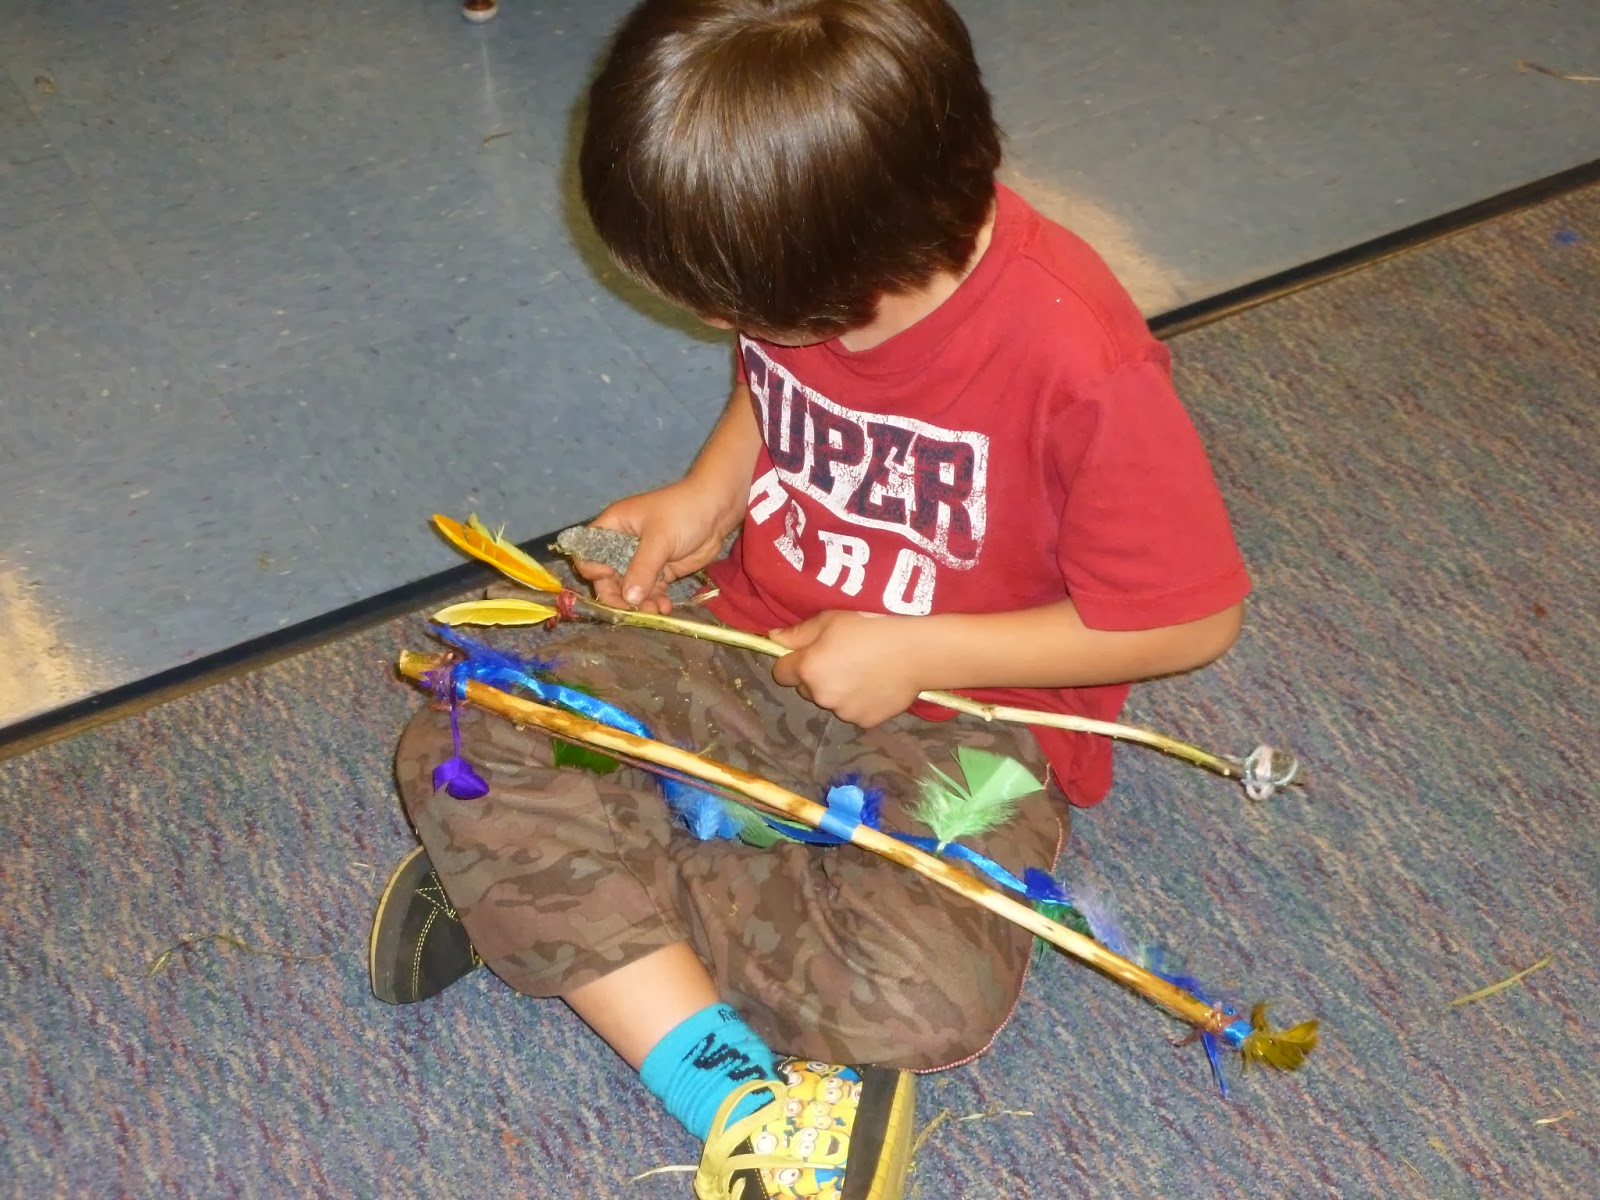
Our first foray into creating our own Native American tool, the bow and arrow gets them all excited to learn more.  To create our first tool, we get branches from bushes and trees in our yards.  To make a tool for taking the bark off the branches we find driveway gravel that has sharp edges. At the same time we look for gravel that has a pointed edge that we can use for our arrow.  We also look for a rock that we can use to shape our other rocks.

Outside the kids scrape the bark off the branches. When that is done we go into the classroom to make our bow and decorate it.  As we are only going to use these for decorations (I make that perfectly clear to the kids) and for a play we will perform. I let the kids decorate their bows with markers. Then we put the cord for the bow on. I explain how the Indians did not have cord that they had to find weeds or use the gut of the deer or buffalo for their cord. We then tie a ribbon on the other side of the bow for our decoration.  I use a hot glue gun to attach the ribbon because it takes too long for the glue to dry.  Then the kids decorate the ribbon with feathers and beads. It will take overnight for this to dry.

Next we use our shaping rock and friction to make our rock look more like an arrow. This is how


I teach about friction and useful it is. We also talk about how Indians used it to make fire and how they did it. When their rock looks good enough to them we attach it to the stick.  Again I will hot glue it and put cord around the rock and the stick to make sure it will stay. Next the kids decorate the other end with whatever feathers they picked out. When they are dry I hang it all on the Native American bulletin board.


This craft has gotten the kids all excited about past Native American life and they want to do more crafts and learn more about their life.


Sunday, November 3, 2013


HANDCRAFTING A BEAUTIFUL PINECONE HOLIDAY CENTERPIECE


As a Kindergarten enrichment teacher, in a private school with no real budget, I am always thinking of how I can have the kids make a gift for parents that is both inexpensive and beautiful.  Years ago I thought of a “green” and easy way for the kids to make a holiday table centerpiece. I have the kids make theirs as a gift for Thanksgiving but it will do for any fall or winter holiday, even as a Christmas centerpiece of you just add some holly or Christmas ornaments.

Materials needed—1.pinecones, 2.cardboard, 3.aluminum foil, 4.glue, 5.voitave candle in a glass

A .Cut cardboard any shape. I use a large paper plate to size mine.

B. Paint or leave natural color but put a circle in center for the glass

C. Glue a circle of aluminum foil in circle(to prevent fires from candle or heat from glass

D. Let kids pick their pinecones out and start to glue, telling them not to glue pinecones in the center of the circle      

E. Glue pinecones

After the glue dries you will have a beautiful masterpiece that is amazing, cheap to make, and organic. The kids will be thrilled about how beautiful the centerpiece came out and the parents will be amazed that their child crafted it. The center piece can last forever as a memento from your class.

                                Another inexpensive, child friendly craft from Miss Gail


PROVING PLANTS DRINK WATER

When teachers do a unit on plants they are always TELLING kids that all plants need water to survive instead of actually showing them.  An easy experiment to prove that plants drink water is to take white flowers such as daisy’s, mums, or carnations and put them into water with a few drops of food coloring.  I use small paper or plastic drink cups, one for each color, and put one or two flowers into each. 


 I let the kids add one color to each cup. Make sure you use enough food coloring to make a fairly dark color.  I also will put a cup with plain water, no coloring and add a flower.  Within two hours the flowers start to show some color.  By day two they should have the same color as if you bought them in the florist.

Now you have proven what you have taught the children in a way that will amaze them enough to forever remember how plants drink water


Sunday, October 20, 2013


DRIED FLOWER AND WEED ARRANGEMENTS-FALL ART PROJECT


INGREDIENTS NEEDED—DRIED WEEDS, PLACTIC CUP, SAND, PLASTER OF PARIS,  SPRAY PAINT

Most teachers teach a unit about the fall season changes and how seeds travel.  We explain how the plants get ready for the fall by producing seeds that get planted in many different ways, by wind, some roll, some stick to animals, some are carried by birds and some are buried by squirrels and other animals.  Many times teachers take the easy and lazy way of just showing the pictures of seeds and try to explain how they travel. This makes no impression on the children. They will look at the pictures, remember some of it until the teacher quizzes them and then out of the head it goes. Hopefully more teachers will try to bring in samples of each method of seeds travel and also bring samples of the different seeds for the children to see, touch, and compare. After actually seeing and touching the seeds the children will understand the processes of travel and it will imprint upon their brains.  Taking a dandelion parachute seed, blowing it into the air always thrills the kids. Taking a sticker bush seed and letting the kids feel how sharp they are and letting it stick to their clothes makes the children understand how animals or people can carry them to a new place where they will plant themselves in the spring.

 
I carry the lesson further and make it more fun. We make dried flower and weed arrangements that last forever.  We will walk around a field and cut some of the weeds that have dried.  The more solid they are the better. Fluffy seeds like dandelion or thistle will not do.  From some gardens cape myrtle round seeds, butterfly bush, dried hydrangea flowers, iris and lilly pods, daisy type seed balls, and any other harder weeds will work well. Some of the time, I even will use dried roses, and zinnias
 

  I will put all the collection of weeds on a table outside (you can do it inside but it is messy).  I have the kids fill a plastic cup (a clear one) with about half sand. I use sand because it will hold the weeds in place.  The more weeds the kids put in the cup the nicer and fuller it looks

After they are satisfied with their arrangement, I will fill the rest of the cup with plaster of paris.  This will add weight to the cup and make it permanent. DO NO FORGET TO PUT THE CHILDS NAME UNDER THE CUP WITH A PERMANENT MARKER.! The kids never remember which one is theirs.


Next I will spray paint it all gold or silver. The beautiful arrangements can be put into a vase if the parents want. THE KIDS AND THE PARENTS LOVE THEM.  I have been in homes of my previous students 8 years later and the arrangements are still prominently placed on a table or even the fireplace.


Thursday, October 17, 2013


STOPPING PREJUDICES BEFORE THEY MULTIPLY


Each year I have been lucky to have a very diverse class of children whose families came from many different cultures and countries. At the beginning of the year the children hang with those who look like them, being unsure of others who appear different. Finding a way to teach them even though they may look different from each other they are the same,  was a big challenge until I thought of my garden.

I grow many different kinds of zinnias and marigold flowers, both of which come in all kinds of sizes, colors and varieties. In September I bring in a bouquet of zinnias and one of marigold


 The zinnias come in many beautiful colors, some with stars in the center, some petals fuller than others, some in double petals, some dwarf, some giant, and those in-between sizes.  The marigolds also come in different sizes, shades from brown to yellow and almost white.
 
  I hold a bouquet of zinnias first and ask if they are the same flower or different kinds of flowers.  The kids always say different kinds.” Why do you think that? “ I ask. The response is because of color, size, looks, etc.  You are wrong I tell them they are all the same kind of flower, zinnias and just like us they come in all sizes, colors, and shapes.  I show the marigold s and ask the same question.  Again they guess they are different types of flowers and again I explain they are the same.  Then I say to them “look around at us-we are all people and look how different we look but we are still people.”  How many of you have brown hair, blonde hair, black hair, blue eyes, brown eyes, green eyes, etc. We go over all the parts of the body, and all our different skin colors and then I ask “with all our differences are we still people with the same amount of hands, feet, spines, fingers, toes, teeth, eyes, etc.  What about our blood, do we all bleed the same color,  We go over all the same organs and I ask again are we all the same even though we are different looking.


 I than go even further and ask about who is the smartest and how do you know. Most of the time the kids think the tallest or biggest kid is the smartest.”  I ask how that can be.”  My young high school aids are always taller than me, I am only 5 feet .  “ I am the teacher and I am shorter than Josey and all the other high school people and all of the teachers. Does that mean they are all smarter than me?”  The kids begin to think all their stereotypes may be wrong. Then I give the zinger-“who is the oldest?” Usually they will pick the tallest kid.  Again I use myself as the example.  I am 74 but the shortest adult in our school.  “How can the tallest kid be the oldest in our class” I ask.  I am the shortest adult in our school and I am the oldest.  All the other teachers are taller than me and I am the only one old enough to be a grandma so you can’t be right about size making someone smarter or older.  We then go through all their birthdays and ages to prove the point. 

By the end of the day all of the concepts and the previous thoughts of their differences, and prejudices have been thrown out the window and they begin to accept how alike they all are even if they look different.  Bringing nature and beautiful flowers and comparing themselves helps sort out whatever they might have learned previously and in a more painless equation that just preaching to them.