1-NATIVE AMERICAN PAST AND PRESENT --BOW AND ARROW CRAFT
In the fall
most kindergartens and other school classes teach about the Pilgrims and how
the Native Americans helped them to survive in our country. I go a step further and teach about the
Native Americans all over our USA and how they live now and in the past. Most children have the concept that “Indians”
lived in America way, way back and think the Natives no longer are alive. They are shocked to find that Native
Americans are alive and well and still live in the USA, in fact some are even
in our classroom. Each year as I teach a
unit on Native Americans ‘ some of the children find out that they are part
Native American. In one class I had
there were 5 with Native Americans ancestors. It also is important to make sure
the kids know that Native American children have to go to school just like
them, that they live in houses, have cars, TV’s, computers and everything they
have because they live in the USA just like them.
Since most
children think of “Indians” shooting bows and arrows, I peak their interest by
explaining about why they had bows and arrows and how they were made. I take
them back to the past when there were no stores, TV, internet, electricity,
cars, etc. This is almost inconceivable
to the kids. Couldn’t they just buy
them? Why weren’t there stores? Are some of the questions I get from the
kids’? I explain how everything had to
be made by hand and from whatever materials were in nature and there was no
metal to make guns, knives, or any other equipment needed by the Natives. In order to get food they had to make their
own bows and arrows to shoot their food.
I explained how clothes, housing, tools, food containers, etc. had to be
made from nature.
Bow and Arrows
Our first
foray into creating our own Native American tool, the bow and arrow gets them
all excited to learn more. To create our
first tool, we get branches from bushes and trees in our yards. To make a tool for taking the bark off the
branches we find driveway gravel that has sharp edges. At the same time we look
for gravel that has a pointed edge that we can use for our arrow. We also look for a rock that we can use to
shape our other rocks.
 Outside the
kids scrape the bark off the branches. When that is done we go into the
classroom to make our bow and decorate it.
As we are only going to use these for decorations (I make that perfectly
clear to the kids) and for a play we will perform. I let the kids decorate
their bows with markers. Then we put the cord for the bow on. I explain how the
Indians did not have cord that they had to find weeds or use the gut of the
deer or buffalo for their cord. We then tie a ribbon on the other side of the
bow for our decoration. I use a hot glue
gun to attach the ribbon because it takes too long for the glue to dry. Then the kids decorate the ribbon with
feathers and beads. It will take overnight for this to dry.
Outside the
kids scrape the bark off the branches. When that is done we go into the
classroom to make our bow and decorate it.
As we are only going to use these for decorations (I make that perfectly
clear to the kids) and for a play we will perform. I let the kids decorate
their bows with markers. Then we put the cord for the bow on. I explain how the
Indians did not have cord that they had to find weeds or use the gut of the
deer or buffalo for their cord. We then tie a ribbon on the other side of the
bow for our decoration. I use a hot glue
gun to attach the ribbon because it takes too long for the glue to dry. Then the kids decorate the ribbon with
feathers and beads. It will take overnight for this to dry.
Next we use
our shaping rock and friction to make our rock look more like an arrow. This is
how
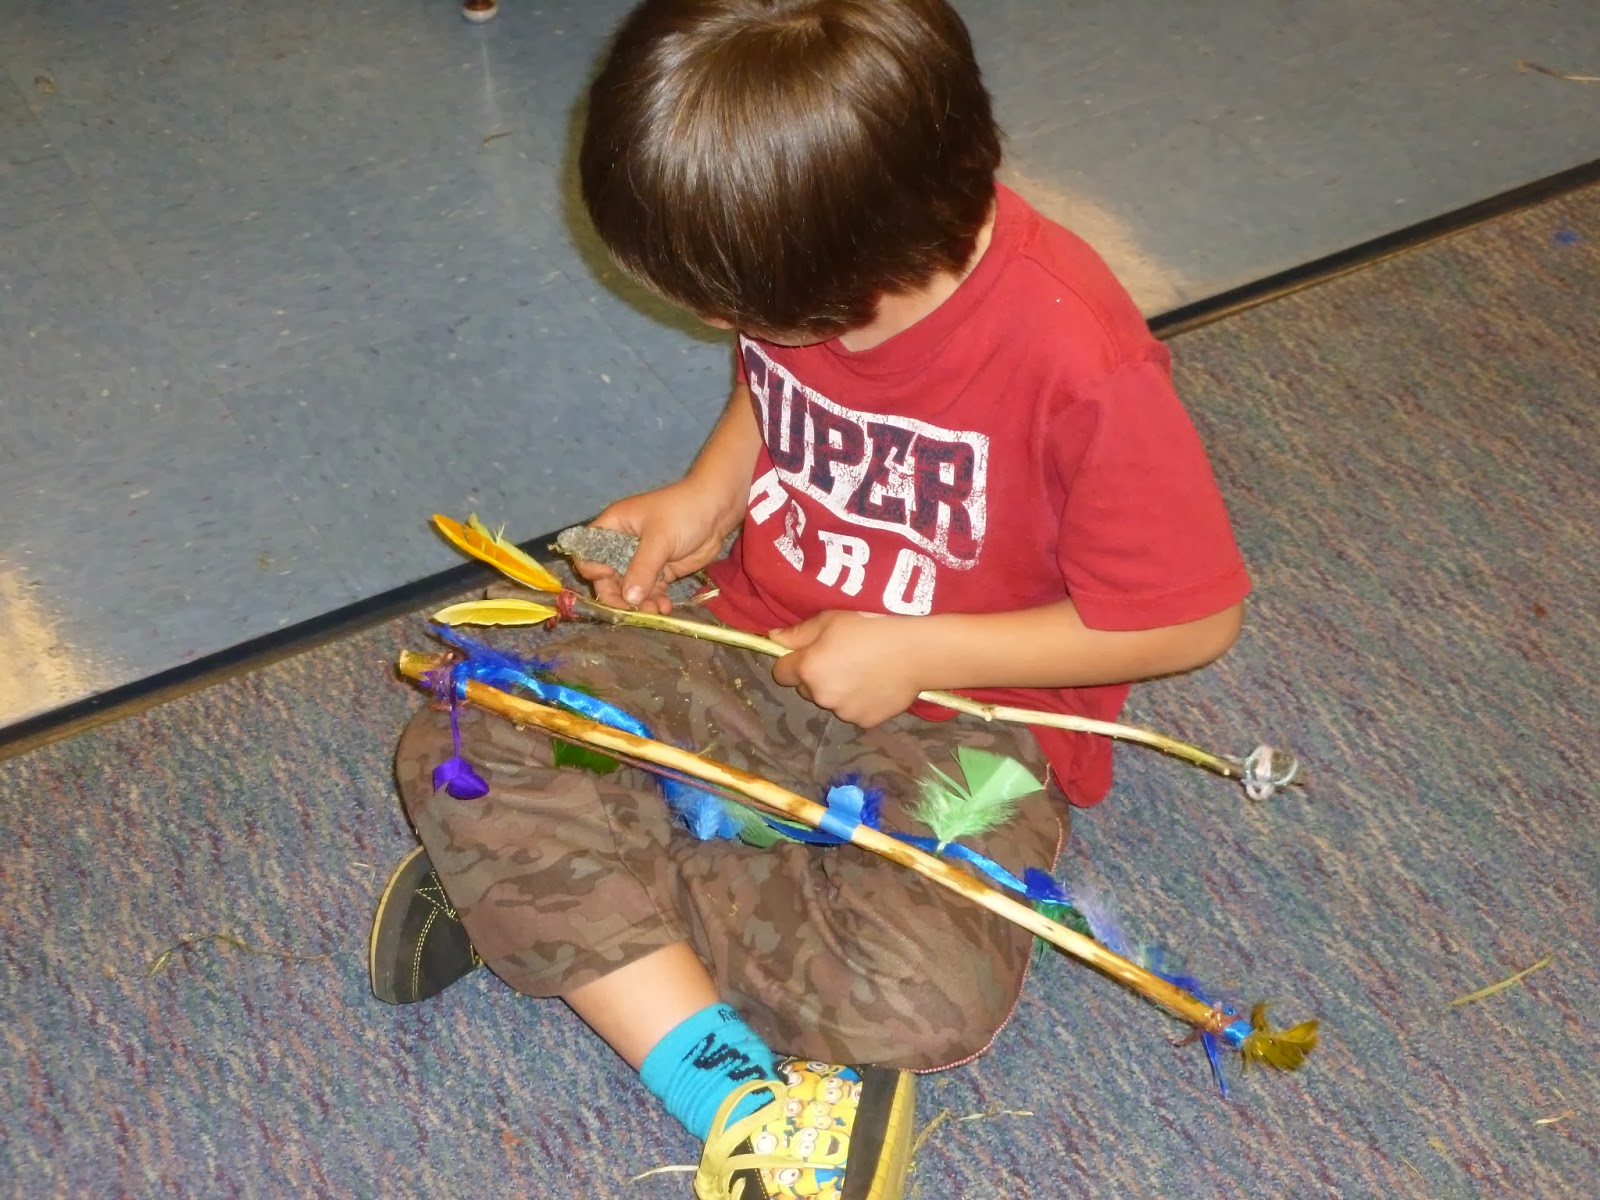
I teach
about friction and useful it is. We also talk about how Indians used it to make
fire and how they did it. When their rock looks good enough to them we attach
it to the stick. Again I will hot glue
it and put cord around the rock and the stick to make sure it will stay. Next
the kids decorate the other end with whatever feathers they picked out. When
they are dry I hang it all on the Native American bulletin board.


This craft
has gotten the kids all excited about past Native American life and they want
to do more crafts and learn more about their life.


 The rocket went up and then down.


